A cloning is a copy of the object that stays connected to the original. This means that if you change the original object—like resizing it, changing its color, or rotating it—all of its clones will automatically update to match those changes. In this guide, we are going to teach you how to use the clone tool in Inkscape, create a duplicate with the clone tool, and make it easier to design.
Steps to Use The Clone Tool In Inkscape
To use the Clone tool in Inkscape, follow these steps:
- Open Inkscape: Launch Inkscape and open your project or create a new one.
- Select an Object: Click on the object you want to clone.
- Activate the Clone Tool: Go to
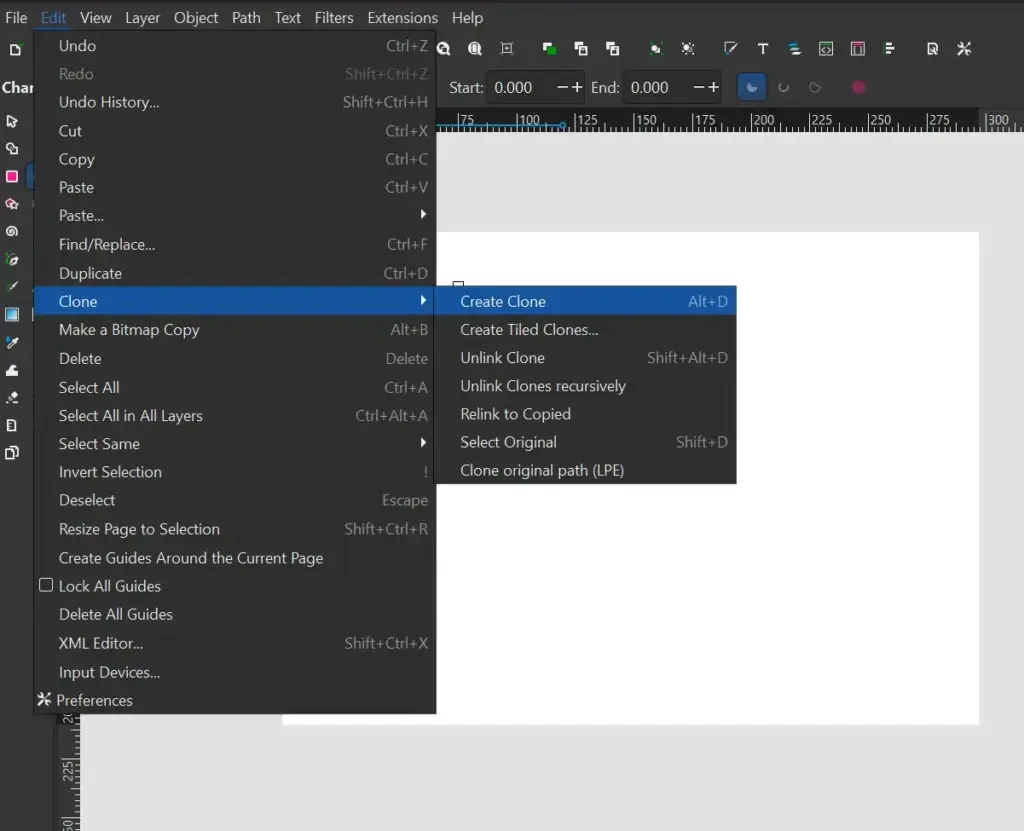
Editin the menu bar, then selectClone, and click onCreate Clone(or use the shortcutAlt+D). - Adjust Clone: The cloned object will appear on your canvas. You can move, scale, and rotate the clone independently of the original object.
- Edit Clones: Any changes made to the original object will be reflected in all clones.
Let’s start with an example In my case, I’m going to create a simple circle and will show you step-by-step how to use clone in inkscape
Step 1: Import or Create an Object
Open Inkscape, then import an existing design or start from scratch using any tool—in my example, I will use the elips tool to create a circle.
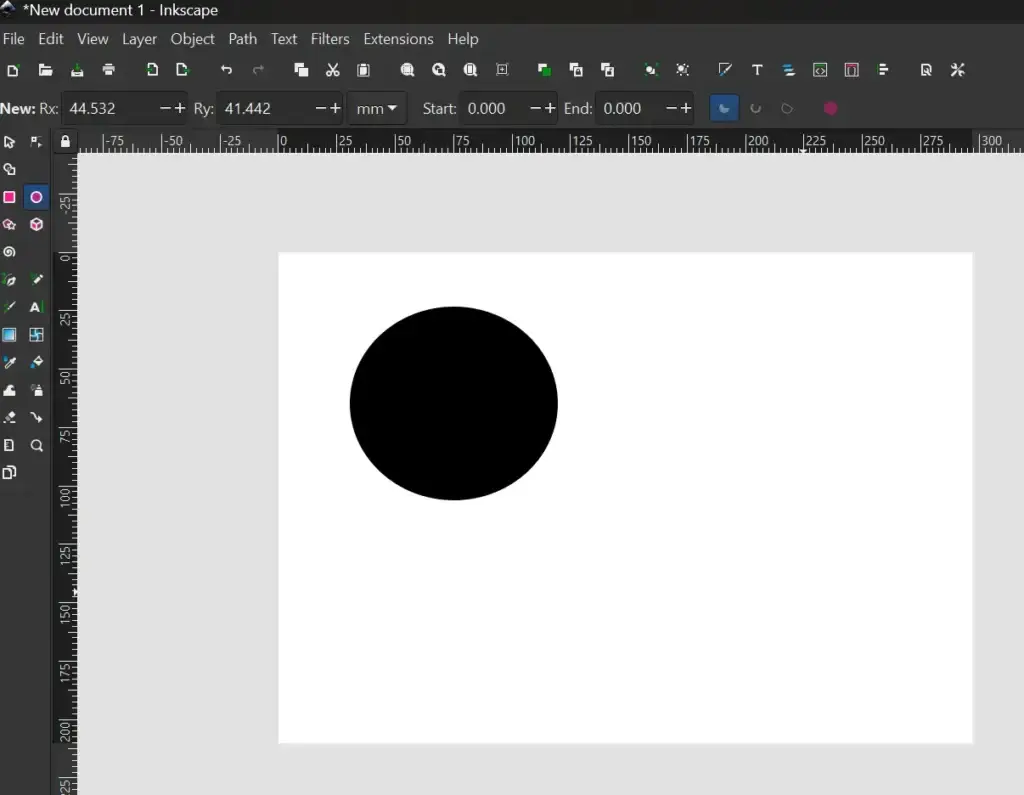
Step 2: Access the Clone Tool
To create the clone of your obct or design you created, navigate to Edit and go to clone and create clone.(Edit > Clone > Create Clone). But make sure that you select the object or design you created; use the selection tool to select. Shortcuts, you can use ( Alt + D)
Step 3: Create and Position Clone
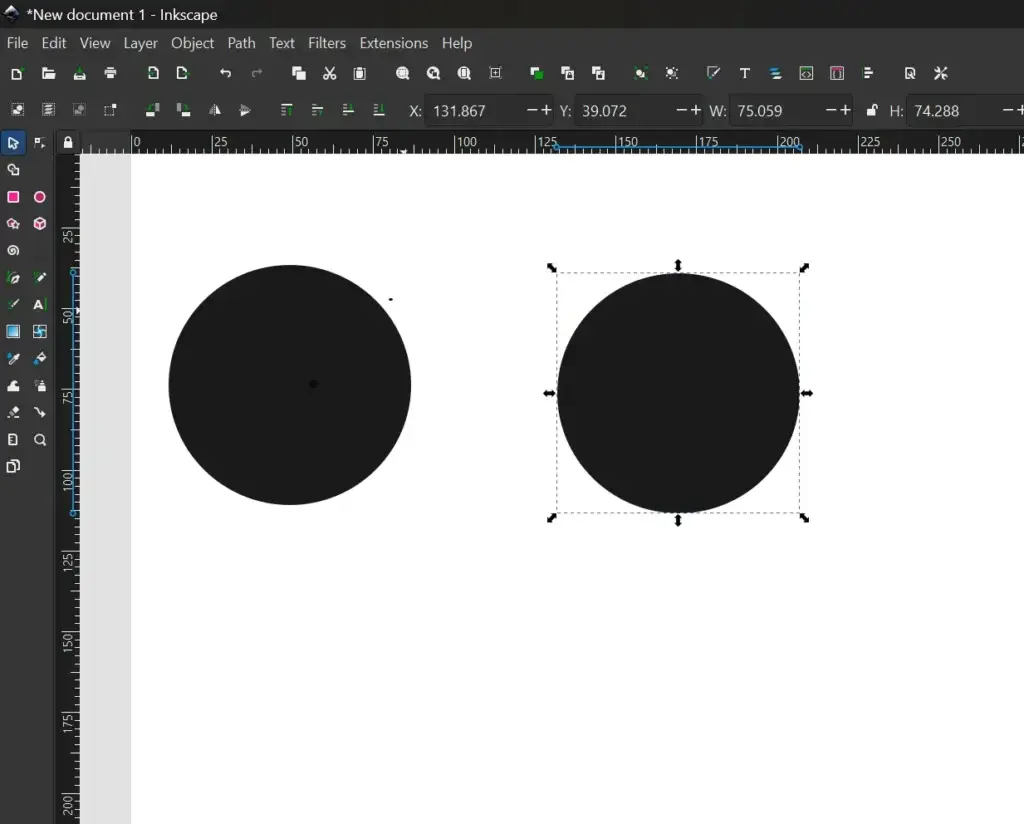
Now that the clone is placed on top of the original shape, you can move that. To move the clone, just use the Move tool or selection tool or click on the object and drag (Click on Object and Drag).
Step 4: Editing Clones
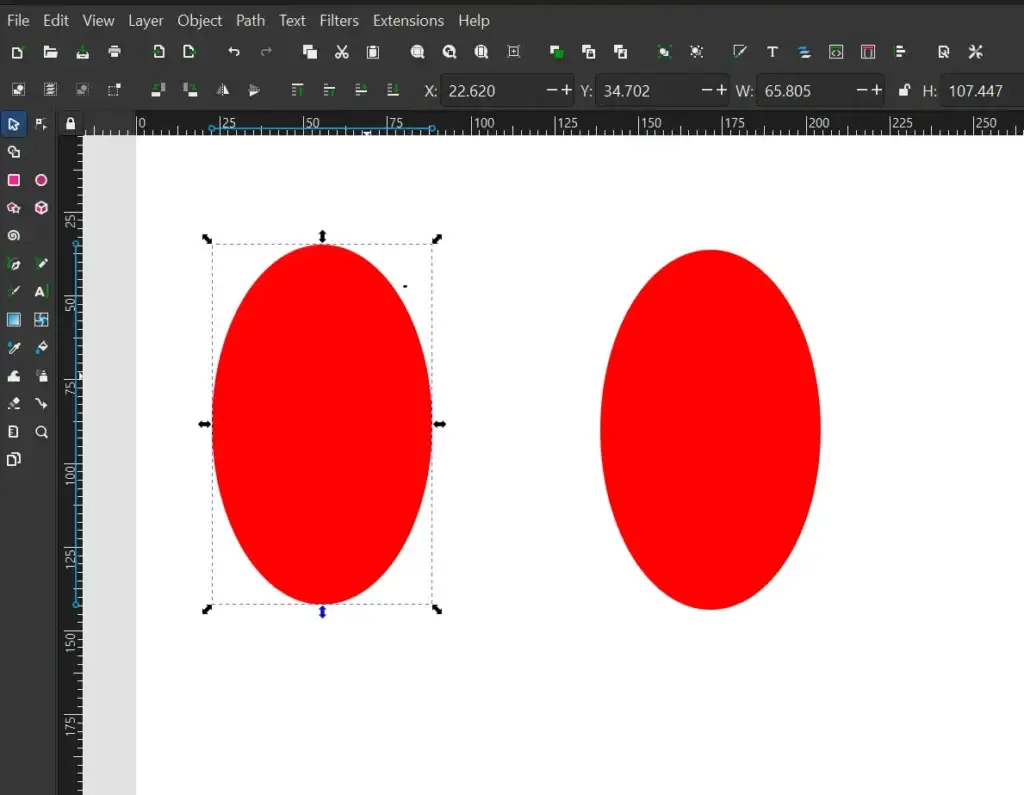
The good thing is if you change something in the original, it will change in the clone; if you do anything like change color, change shape, or anything, it will copy these properties to the clone. Have a look at the picture. I changed the color and shape of the object, and it changed automatically on clone.
Step 5: Group Clones
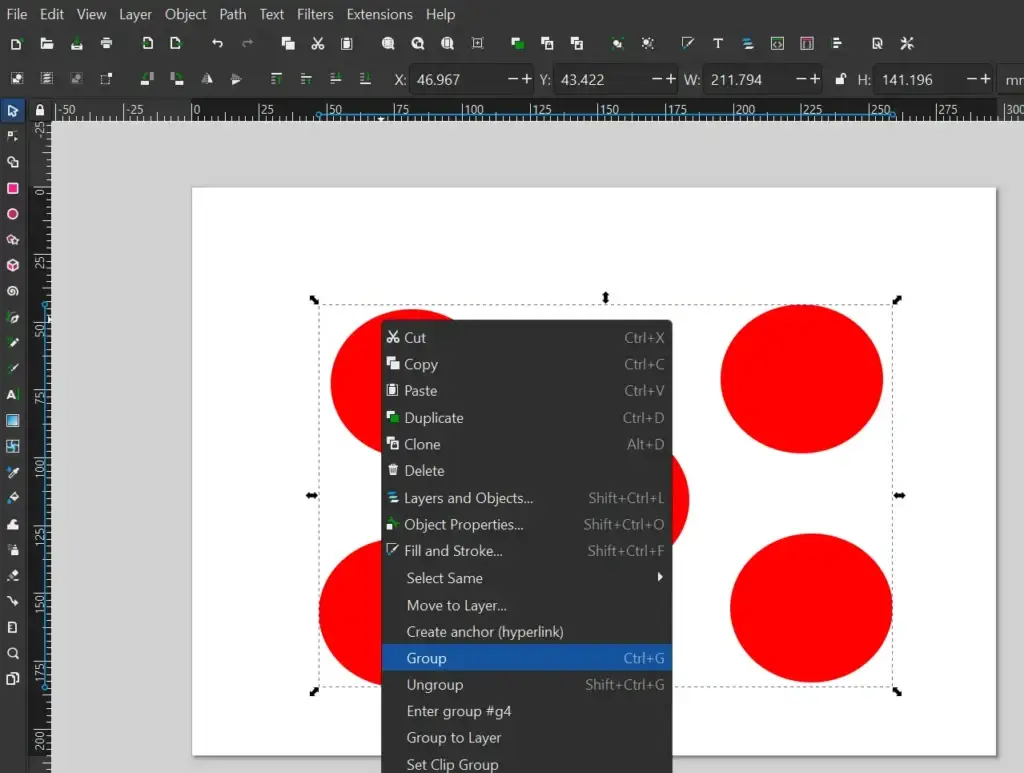
If you’re creating multiple clones at once, you can group clones to manage them more effectively. Select multiple clones using the selection tool, then right-click and choose Group. This allows you to move, scale, or apply transformations to all selected clones simultaneously.
Likewise, make sure your system meets the requirements if you wish to explore more professional design software, such as Adobe Illustrator.
Advanced Cloning Techniques
1. Creating Patterns
The cloning object in Inkscape is excellent for pattern creation. For example, you can create a grid or radial pattern by cloning an object and then using the Object > Transform menu to position each clone in a structured layout.
2. Creating Variations
You can create variations of your clones by applying different transformations, such as scaling, rotating, or changing colors. This approach is useful for creating complex designs that
Practical Applications of the Clone Tool in Inkscape
The Cloning in Inkscape is not just a nifty feature; it’s incredibly useful in many real-world design scenarios. Here’s how you can use it in practical ways:
1. Designing Logos
When creating a logo, you might need to repeat certain elements to maintain consistency. For example, if your logo includes a pattern or a symbol that needs to be repeated, you can use the Clone Tool to create multiple instances of that symbol.
Example: Imagine your logo has a small star as part of the design. You can clone the star and position the clones around your logo to create a cohesive look without having to draw each star individually.
2. Making Patterns
Patterns are everywhere, from wallpapers to textiles. The Clone Tool helps in creating these repeating designs quickly.
Example: Suppose you’re designing a fabric pattern with a leaf shape. You can clone the leaf and arrange the clones in a grid to make a repeating pattern. This ensures that each leaf is identical and neatly aligned.
3. Creating Repeating Elements
In many designs, especially those with repetitive elements, the Clone Tool can save you a lot of time.
Example: If you’re designing a poster and want to include multiple instances of the same graphic element (like dots, stars, or shapes), you can clone the original element and place the clones where you need them. This keeps all the elements consistent.
4. Designing Illustrations
Illustrations often include multiple copies of the same object. Using the Clone Tool allows you to make these copies quickly and ensure they all update if you change the original.
Example: If you’re drawing a scene with multiple trees, you
Troubleshooting and FAQs
Q: My clones aren’t updating when I change the original object. What’s wrong?
A: Ensure that the clones are indeed linked to the original object. You might have accidentally unlinked them. To check, select a clone, go to Edit > Clone, and verify if it shows as create clone or notUnlink Clone.
Q: How do I unlink a clone from the original object?
A: Select the clone, go to Edit > Clone > Unlink Clone. This will break the link between the clone and the original, allowing you to edit the clone independently.
Q: My document is slow with many clones. What can I do?
A: Large numbers of clones can slow down Inkscape. Consider grouping clones or simplifying your design to improve performance.
Conclusion
We hope that this guide has been helpful in understanding how to use the clone tool in Inkscape. By cloning objects, you can save a huge amount of time and make your work flow more efficient. For more details, you can visit Design Bundles.

Perfect sir thanku so much for sharing 🤎🙏
This is exactly the information I’ve been looking for! I’m really impressed. Thank you so much for your help!